How to Use AI to Combine Two Images Into One Photo
A step-by-step method to AI combine two images into a single believable photograph: what to check before uploading, the four parts of an instruction that works, and how to diagnose the result when it comes back wrong.
The instruction “AI combine two images” hides a decision most people skip: do you want the two photographs next to each other, or do you want one photograph that contains both? They are completely different jobs, and choosing the wrong one is the single biggest cause of a disappointing result.
This guide covers the second job — merging two photos into one frame with no visible seam. It is written as a process you can follow, with the checks that matter at each stage.
Most of the work in getting an AI to combine two images well happens before you write a single word of instruction, so that is where we will start.
Before you upload: three things that decide the outcome
Most of the quality of a merge is determined before the software sees anything. Ten seconds of checking here saves several attempts later.
Resolution
Use the largest version of each file you have. Not the WhatsApp copy, not the screenshot, not the image saved from Instagram. Compression artefacts are baked in, and the model will faithfully reproduce them. If your subject occupies a small part of a large photo, that is fine — what matters is the pixels on the subject itself.
Light direction
Look at each photo and answer one question: where is the light coming from? If your subject is lit from the left and your scene is lit from the right, the merge has to reverse the lighting on your subject. Modern models can do this, but it is the hardest thing you can ask, and the failure rate is noticeably higher. Where you have a choice of source photos, pick the pair whose light already agrees.
Camera height and angle
A photo taken at standing height does not sit naturally in a scene shot from waist height. Look at the horizon line in each image. If they are wildly different, expect to fight the perspective.
The five steps
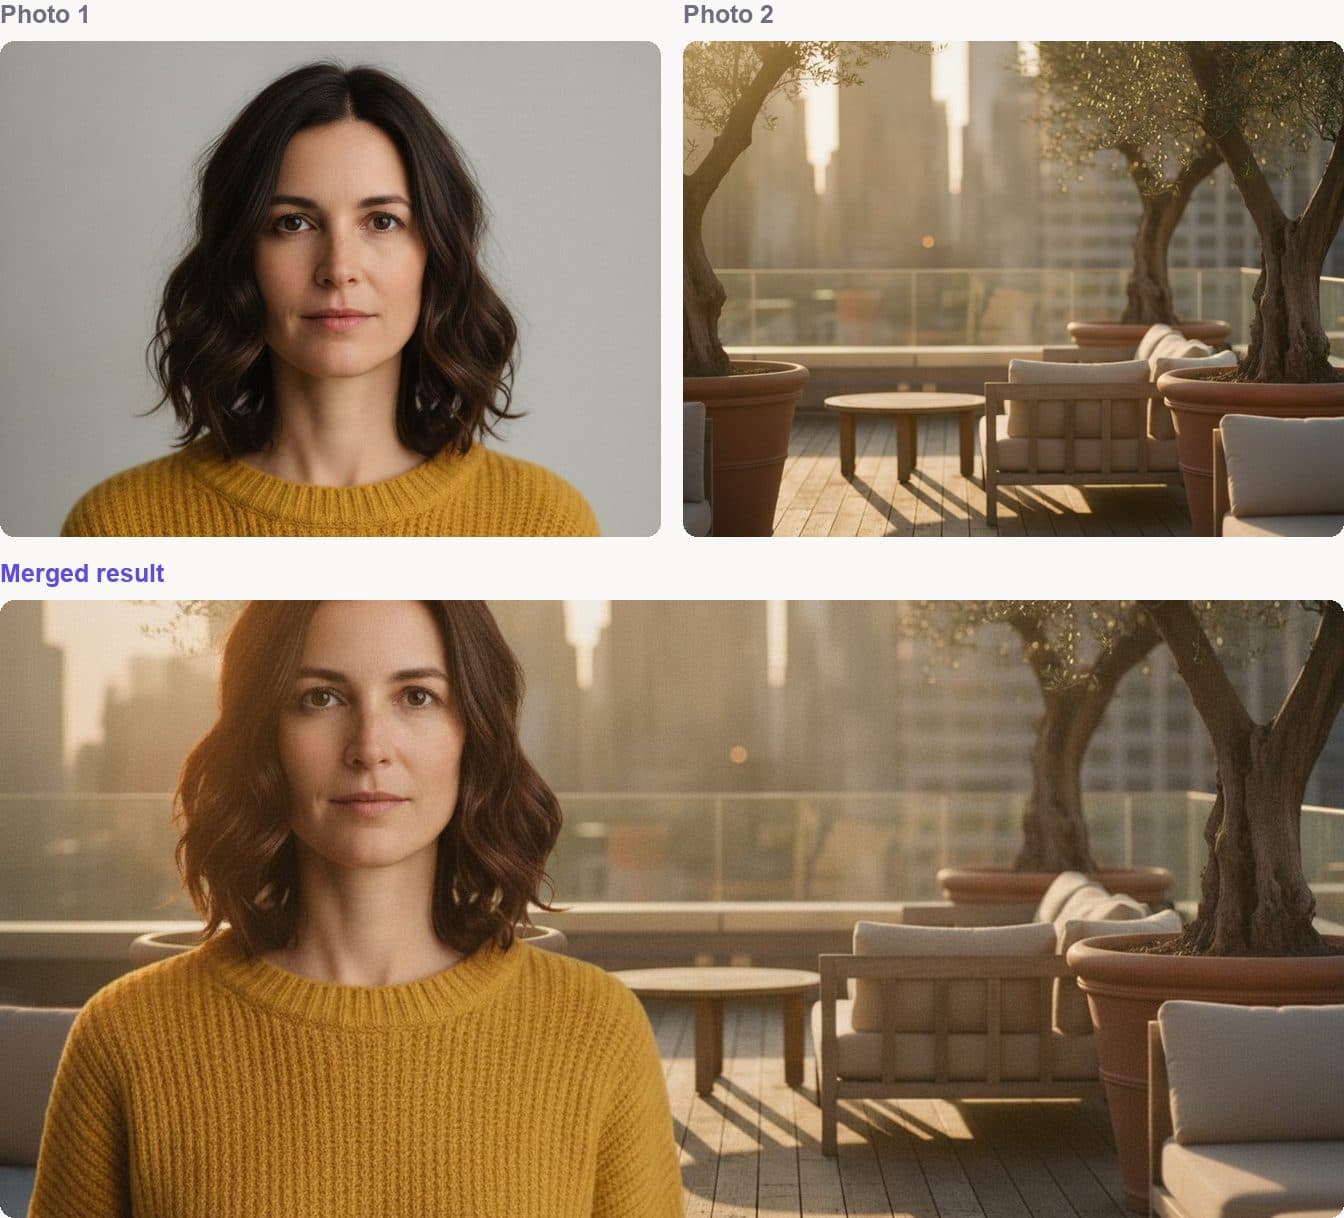
1. Decide which photo is the subject and which is the scene
One image supplies the thing you want to keep. The other supplies the world it goes into. Being clear about this before you upload makes every later step easier, because your instruction can then refer to them unambiguously.
In the example above, the portrait is the subject and the rooftop is the scene.
2. Upload them in that order
Order matters, because your instruction refers to the photos by position. Subject first, scene second is the convention we use and the one the Image Combiner assumes. You can drag the thumbnails to reorder them if you get it the wrong way round — nothing needs re-uploading.
3. Write the instruction
This is where results are won and lost. A good instruction does four jobs, and it is worth checking your sentence against all four.
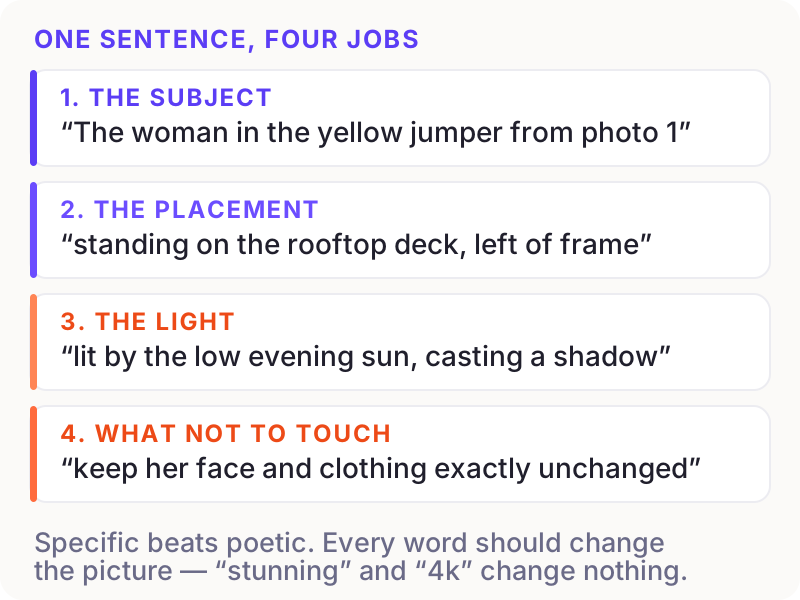
Put together, that example reads:
The woman in the yellow jumper from photo 1, standing on the rooftop deck, left of frame, lit by the low evening sun with a contact shadow on the decking. Keep her face and clothing exactly unchanged.
Note what is absent. No “beautiful”, no “high quality”, no “8k”. Those words describe how you feel about the output rather than what should be in it, and they cost you nothing but they buy you nothing either. There is more on this in writing prompts for image merging.
The single most valuable phrase is the last one. “Keep her face exactly unchanged” protects the thing people most often lose — a subject who comes back looking like a cousin of the person you uploaded.
4. Choose the output shape
Decide where the image is going before you generate, not after. A 16:9 frame cropped to a square later will lose a third of the composition, and it is usually the third you cared about. If the destination is a website header, set it wide now.
5. Review against five checks
When the result arrives, look at these in order: shadow direction, edges around hair and shoulders at 100%, colour temperature of skin against the scene, the subject's scale relative to nearby objects, and whether there is a contact shadow where they meet the ground. Our AI image combiner guide explains what each of those failures looks like.
When it comes back wrong
Almost every bad result maps to one of five causes. Match the symptom and change one thing.
The face changed
Your instruction did not protect it. Add an explicit preservation clause — “keep the face in photo 1 exactly unchanged, do not restyle it” — and regenerate. If the face is small in the source photo, crop in tighter before uploading so more pixels describe it.
The subject looks pasted on
Usually a missing contact shadow, a lighting mismatch, or both. Name the light explicitly: “lit from the upper left by warm evening sun, with a soft contact shadow on the ground beneath her feet.”
The subject is the wrong size
Give it a reference instead of an adjective. “Standing beside the table, roughly as tall as the doorway behind her” works. “Make her bigger” does not, because the model has no idea what size it used last time.
The background changed when you did not ask
Add a negative instruction. “Do not alter the background, the furniture or the sky.” Negative instructions work far better than they used to.
Two attempts failed the same way
Stop rewriting the sentence. When two specific prompts fail identically, the problem is upstream — a source image that is too small, too dark or too compressed. Fix the input.
Side by side, or actually combined?
Worth settling before you spend anything. This is the same pair of photos treated both ways:
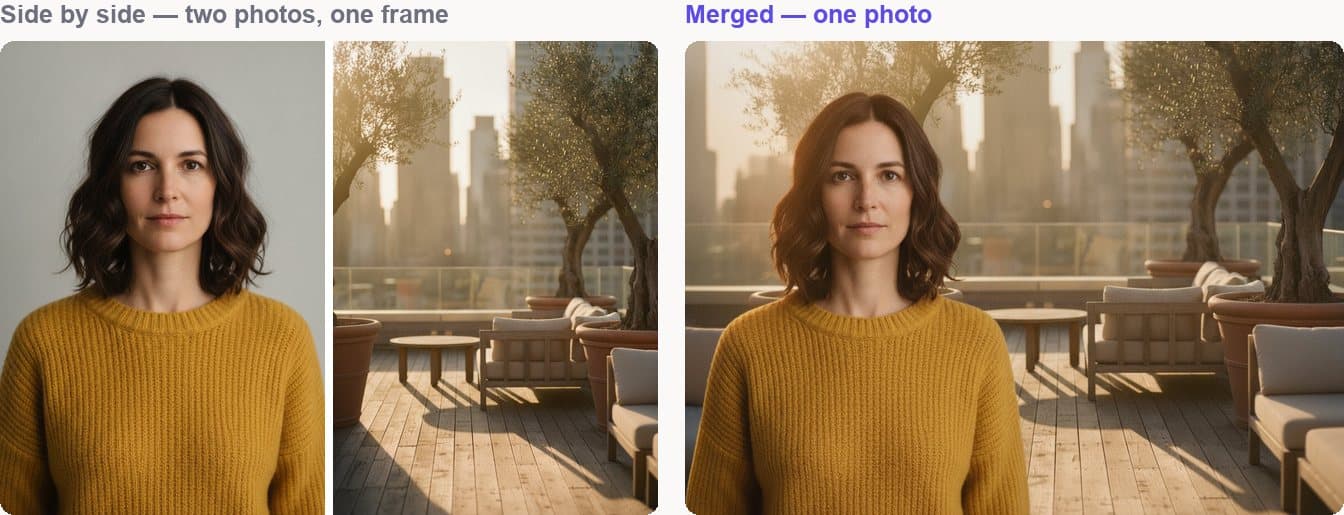
The left is a layout. Both originals survive intact and the viewer sees two pictures. It is the right answer for before-and-after comparisons, product variants and anything where the reader is meant to compare.
The right is a merge. There is one photograph and one moment. It is the right answer when the two pictures should have been one all along.
If the left is what you want, you do not need an image model at all — how to put two images side by side lists the free ways to do it on whatever device you are holding.
A worked example, start to finish
Say you have a photo of a friend at a party and a photo of a beach, and you want them on the beach.
- Find the original of each, not a forwarded copy.
- Check the light. Party photo lit by flash from the front; beach shot in soft overcast light. These disagree, so expect to name the change explicitly.
- Upload the friend first, the beach second.
- Write: "The man in the blue shirt from photo 1, standing on the wet sand near the water's edge in photo 2, in soft overcast daylight with a faint shadow beneath him. Keep his face and shirt exactly unchanged. Do not change the sea or the sky."
- Set the output to landscape.
- Generate, then check the five things. The flash-lit face is the likely weak point, so look there first.
If the face still reads as flash-lit against overcast surroundings, add “remove the hard flash lighting from his face and relight him in soft, even daylight” and run it again.
Getting started
You do not need an account to try any of this. You can upload both photos, arrange them, write the instruction and set the output shape first — the point at which AI combines two images into one is the only step that costs anything. An account and credits are needed only for the generation itself — see the pricing page for what that costs, or the FAQ if you want the details on credits first.
If you are combining two images of the same person taken at different times, Same photo, two people is set up for exactly that case.