AI Image Combiner: What It Does and How to Choose One
An AI image combiner merges two photos into one frame rather than placing them side by side. Here is what that means in practice, the five things that separate a convincing merge from an obvious one, and how to judge a tool before you pay.
An AI image combiner takes two or more photographs and returns a single new one. Not the two pictures placed next to each other — one frame, in which the subject of the first photo genuinely looks like it was photographed in the second.
That distinction is the whole subject of this article. It is also where most of the disappointment comes from: people arrive wanting a merged photograph and end up with a mixture of pictures glued together at the seam. This guide covers what the software is really doing, the five things that give a bad merge away, and how to judge a tool before you hand over money.
What an AI image combiner actually is
At its simplest, it is three inputs and one output.
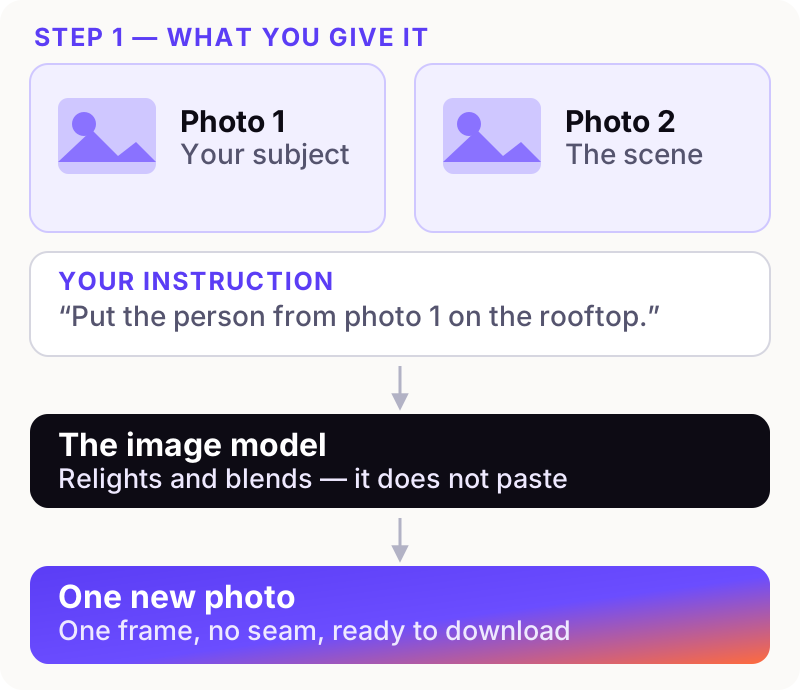
You supply a subject photo, a scene photo and a sentence describing what should happen. The model reads all three together and paints a new image. It is not compositing your pixels in the way an editor would — it is generating a fresh photograph that keeps the things you asked it to keep.
Why it is not a collage maker
A collage tool arranges your photos in a grid. Every original pixel survives, and the seams between images are the point. That is a legitimate thing to want, and if it is what you are after, our guide on how to put two images side by side covers the fastest ways to do it on a phone or a laptop.
An image combiner does the opposite. It destroys the seam. There is no line where photo one ends and photo two begins, because the output is a single generated frame.
Why it is not a background remover either
Background removal cuts your subject out and drops it onto something else. The cut-out keeps its original lighting, which is why those images so often look wrong — a person lit by an office window standing in a sunset.
A combiner relights. Move someone into warm evening light and their skin tone, the rim light on their hair and the direction of their shadow should all change to match. When people say a merge “looks real”, relighting is usually what they are responding to.
What it looks like in practice
Here are two ordinary photos and the single image made from them. The portrait was shot against a plain grey wall; the scene is a rooftop at golden hour.
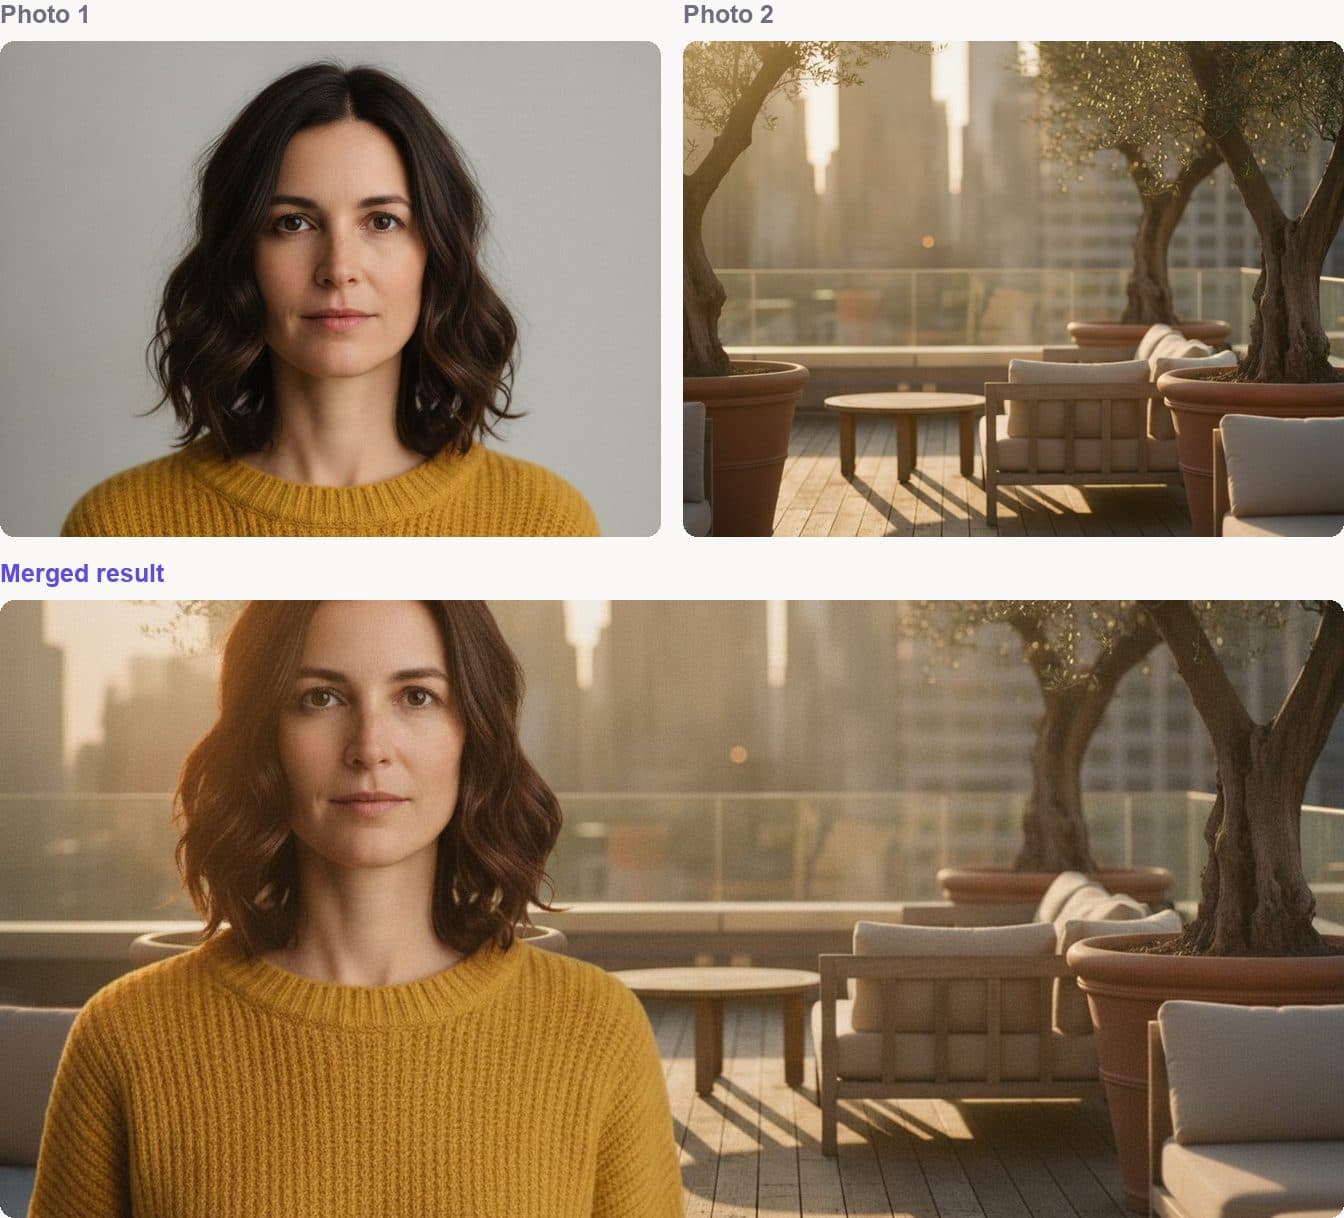
Look at what moved. Her face and clothing are unchanged — that is the part you never want touched. But the flat studio light is gone, replaced with the warm directional light of the scene, and there is a shadow on the decking that agrees with the sun behind her. Nothing in the source photo had that shadow. The model added it because a person standing there would cast one.
What people actually use one for
The requests that come through our tools pages fall into a handful of patterns:
- Getting two people into one photo. Somebody was missing on the day, or two photos exist and no photograph of both. This is the most common request by a wide margin.
- Changing the background. A good portrait ruined by a cluttered room. Swapping the background keeps the portrait and loses the room.
- Putting a product into a scene. A packshot on white needs to look like it is sitting on a kitchen counter. Our product compositing checklist goes deeper on this one.
- Trying an outfit on. A garment from a listing photo, worn by a specific person.
- Repairing and merging old photographs. Two damaged prints of the same family, combined and cleaned up.
How to tell a good result from a bad one
You do not need a trained eye. You need five specific things to look at, and they are the same five every time.
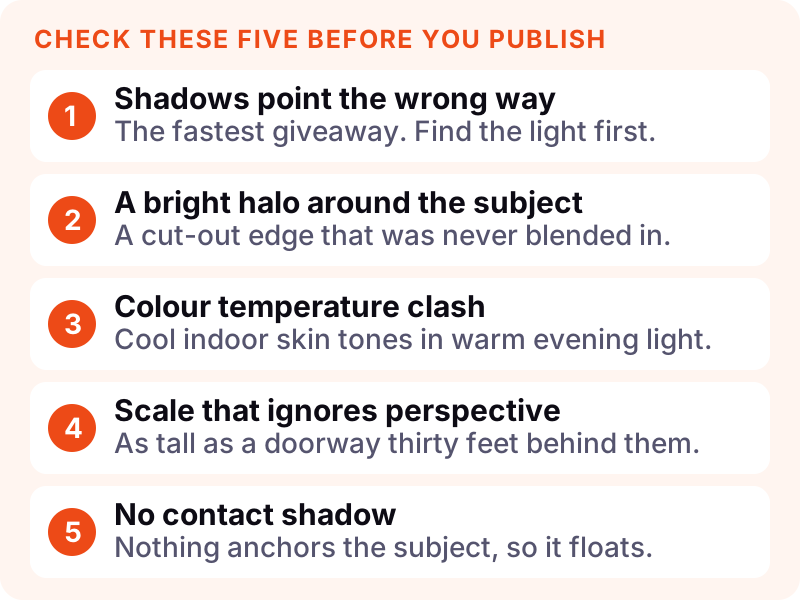
Shadow direction is the fastest tell. Find the light source in the background, then check that every shadow in the frame runs away from it. One shadow pointing the wrong way undoes everything else.
The halo is a pale fringe around the subject, left behind when an edge was cut out rather than blended. Zoom to 100% around hair and shoulders — it hides there.
Colour temperature should be consistent. Cool skin tones in warm light look like a sticker.
Scale has to respect perspective. A person standing thirty feet back cannot be the same height as the doorway beside them.
A contact shadow is the small dark area where a subject meets the ground. Without it, things float. It is the detail most tools skip and the one that most reliably sells a composite.
Making a mixture of pictures that still reads as one photo
If you are assembling a mixture of pictures from different sources — different cameras, different days, different weather — the merge is only as good as the agreement between the inputs. Three habits do most of the work:
- Match the light before you upload, not after. Two photos taken in similar conditions merge convincingly. A flash portrait and an overcast landscape will fight, and no instruction fixes that reliably.
- Use the largest files you have. Screenshots and images pulled from social media are already compressed. The model has less to work with and the output shows it.
- Keep the camera height plausible. A photo taken from standing height does not combine cleanly with one shot from the floor. Our how it works page walks through the ordering that makes this easiest to control.
How to judge a tool before you pay for one
Most combiners look identical on their home page. These are the questions that actually separate them:
- Does it let you see the result before you commit? You should be able to load your photos, arrange them and set everything up before any payment is involved.
- Can you control the output shape? Being locked to square is a real constraint if the image is going on a website header.
- What happens to your uploads? This matters more than people assume, particularly for photos of children. We wrote about what happens to uploaded photos and what to look for in anyone's terms.
- Which model is behind it? Most of the good tools are built on the same family of image models. Ours is explained in plain language in Nano Banana, explained.
- Is the pricing honest? Per-merge credits that expire quietly are a common trap. Ours are set out on the pricing page with no trial that converts into something you did not agree to.
What no combiner can do yet
Being straight about the limits saves you time:
- Hands in complicated poses still go wrong often enough to check every time.
- Small text does not survive. A logo usually holds; a paragraph of ingredients will not.
- Exact counting is unreliable. Ask for seven objects and you will sometimes get six.
- Precise architectural geometry can drift by a degree or two, which is visible on long straight lines.
- It cannot invent detail that was never captured. A face that is forty pixels wide in the source will not come back sharp.
Where to start
If you have two photos and five minutes, the fastest way to understand any of this is to run one merge and look at the result against the five checks above. You can load your images, arrange them and write your instruction in the Image Combiner without an account — you only need one when you are ready to generate.
If you want the next level of detail, writing prompts for image merging covers the wording that changes outcomes, and AI combine two images: a step-by-step guide walks the whole process end to end with a worked example.